Create your own green screen effects with the color key filter. It’s rendered live in your web browser for easy previewing.
Using the Color Key filter is an easy way to remove the background from a video with a solid color. The best part is it’s rendered live in your web browser, without needing to wait to see the results.
You can choose from tons of pre-made stock footage that has a green background for easy removal, or create your own.
If you want to shoot your own footage, you can buy a bright green sheet from any retailer. We’re fans of this Emergency Green Screen blanket which is a fun item to keep around. Make sure to light the green screen evenly to keep the colors consistent, and have your subject stand far enough away from the screen that they aren’t hit with too much green light bouncing off the green screen. Also, the higher resolution you can record with your camera, the better the result since there will be more pixels to work with.
Blue screen effects are easy with the Color Key filter
When you bring the footage into a sequence, drag and drop the Color Key filter onto it and adjust the settings. You can choose what color to remove, how to handle similar colors, and how much blending there should be.
If you don’t have an account, you can sign up for free and try out the Color Key effects yourself!
Our goal is to make the video editing process as easy as possible, and our team is constantly walking the line between adding advanced features while keeping them easy to use.
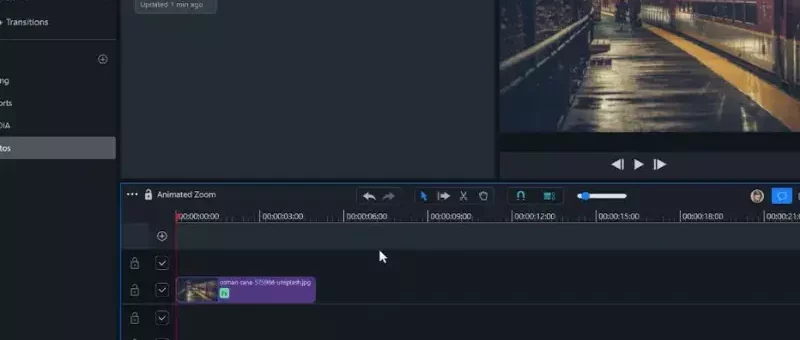
To give editors on our platform a way to animate photos and videos, while keeping it simple and fast, we added the Animated Zoom filter you can drag and drop onto your clips.
Animated Zoom
The Animated Zoom filter can be found under Effects + Transitions, and can be dragged and dropped onto any video or image in your sequence.
In the Effects Settings for the clip, under the Filters tab, you can adjust a few settings. Choose the Point of Interest, which is the position on the clip that will be zoomed into. You can also choose the Amount, which is how much zoom should be applied, and you can Reverse the effect to Zoom out.
There are no keyframes to worry about, and the filter automatically adjusts when you trim the clip (shortening or lengthening it) so the effect always runs the entirety of the clip. One big headache with animating photos in other editing platforms is needing to adjust keyframes after trimming, but with this filter those headaches are gone.
Give the filter a try and let us know what you think. And if you haven’t tried the video editor before, sign up for free and see how easy video editing and management can be!
One of the most complicated parts of the video editing process is when you need to share work with a team, especially if they are spread out geographically. Transferring large amounts of media, keeping track of project versions, converting formats, and unending email chains can cause headaches for even the most seasoned post production expert. Even a simple edit with just a few files can easily become a nightmare to keep track of project versions.
We created the platform to address these pains and modernize video collaboration. A single place where people can use a web browser to edit, collaborate, and publish their videos. The video editor is fast, easy to use, and the only non-linear video editor that runs in a web browser and has real-time collaboration.
Click here for more information about the video editor.
Sharing the same project
The first problem that needed to be solved was allowing everyone on a team to edit the same project at the same time. Tools like Google Docs have enabled that with documents for years, but only a few high-end video editing solutions offered that and none were cloud-based. You had to be in the same office on the same network.
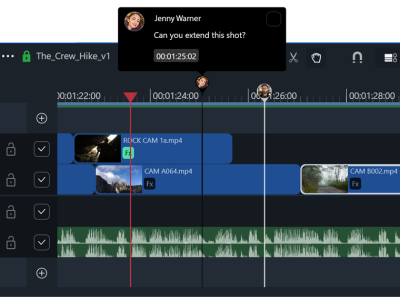
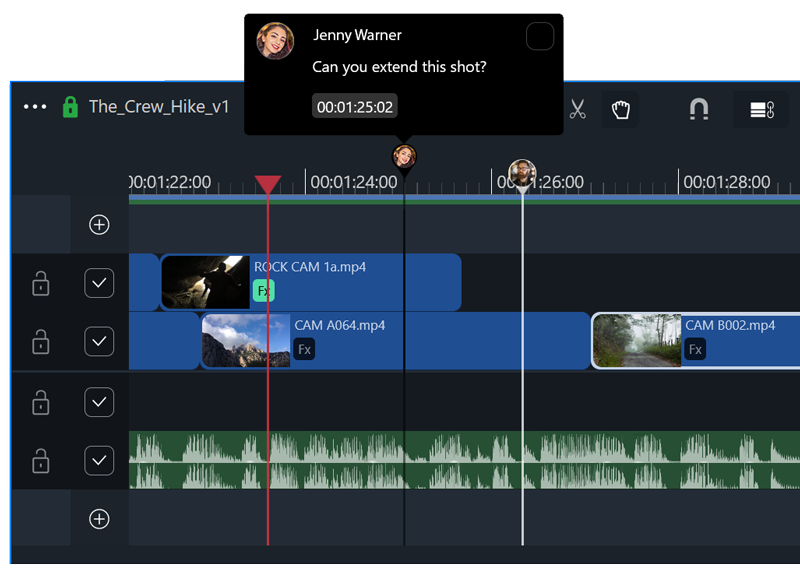
With the collaboration tools on the platform, everyone is seeing the video edits — and changes to those edits — in real-time. You can divide and conquer different sections of a video, or simply watch the cut while someone else works, giving instant feedback and vastly shortening the amount of time to get approval.
Here’s how to share your project with your team:
Use the New menu when browsing a folder to create a new sequence
Right click the sequence and choose “Edit”
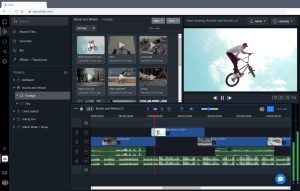
When hovering the mouse over a video, you can press the i and o keys to set in and out points on the video. This will set the time range for the video when you drag it into the sequence.
Drag and drop videos into the sequence. You can adjust the timing of videos by dragging the ends of each clip to resize them.
Any users you’ve invited to your Workspace can also open and edit the sequence, and will see your updates as you make them. They can add or update clips too, and their avatar line will show you their location in the timeline.
If you don’t want your team members to change anything in your sequence, you can click the lock icon to lock the sequence. Then, they can only copy and paste clips out of your sequence, but can’t edit anything in it.
If you want to save the current version of the sequence, click the ... menu on the sequence panel and choose “Save new version.” Then you can select which version you want to see by clicking the version dropdown menu next to the sequence name.
You can always go back to previous versions, and easily duplicate sequences if necessary.
That’s just scratching the surface of what you can do with the platform. To see how much time the browser-based video editor can save your team, sign up for free and give it a try. Let us know what you think, too. We’re always looking to improve the service, and can’t wait to hear your feedback as we build the platform.
With remote work becoming the norm and teams becoming increasingly separated by geography, it’s important for teams to use the best tools to keep their creative pipelines running smoothly. Footage needs to be secure, everyone needs to access it, and editing needs to be a fast moving collaboration.
Traditionally, this meant shipping hard drives, uploading to the cloud only to download later, and using a mix of a bunch of services to make post production happen. Thankfully, there’s a better solution that handles the headaches of the entire post production process, in one easy-to-use platform.
The Revolutionary Video Platform
We built the platform to be easy to use, accessible from anywhere, and highly secure. It takes care of the entire process of editing, from uploading and editing, to reviewing and publishing. The best part is you can do it all from the same place, in a web browser.
For more information about media management, click here.
Uploads are super fast, thanks to our multi-part acceleration. Once uploaded, videos are transcoded for web playback, and anyone with permission (granted in the Workspace settings) can view, comment, and edit the files.
You can share files for review in Review Links, where external clients can comment, approve, and download (if permitted) the files. You can see a full report of everything everyone has done in the review link.
The best feature, however, is the ability to edit your videos right from the same web browser. No plugins needed, and you don’t have to download any editing software. Simply create a new sequence and start editing.
For more information about the collaborative video editor, click here.
Here’s how to edit a video in your browser:
Log in, and navigate to a folder in the Files view.
Drag and drop any videos you want to edit from your computer into the Files view
Once they are uploaded, the transcode pipeline will make versions that can be streamed for playback
Create a new sequence (New > Sequence), right click it, and select “Edit”
Once your videos are transcoded, you can drag and drop them into the sequence and start editing them together
Video edits are frame-accurate, and will play back smoothly while you work.
Once you’re done with the edit, you can click the ... menu in the upper left of the sequence panel, and choose Export > Video to create a high-bitrate mp4 of your sequence.
Your team can comment on your edit while you go, and can even help out with some of the edits. You’ll see the changes live as they make them, just like Google docs.
When the video is done and exported, you can automatically publish the video to social media such as YouTube. You can connect publishing destinations in the Workspace settings, and then publish to them by right-clicking videos and choosing Publish.
Give it a try, and see how much time it can save you and/or your team. And let us know what you think!